Gutters are a critical part of any property, channelling rainwater away from roofs, walls, and foundations to prevent structural damage, damp issues, soil erosion, and unsightly staining. Choosing the right gutter system and installing it correctly is key to protecting a property for years to come.
While many installers are familiar with uPVC systems, metal gutter systems (steel, aluminium, and cast iron) require additional considerations around handling, cutting, sealing, thermal movement, and structural support.
Our guide is designed to support both experienced tradespeople and confident DIYers.
Understanding Metal vs Plastic Gutter Systems
Plastic (uPVC) Gutters
uPVC systems are:
- Lightweight
- Corrosion-resistant
- Cost-effective
- Easy to cut and handle
They are typically joined using push-fit connectors with rubber seals, though some systems may use silicone for additional sealing. Plastic gutters are ideal for most residential properties and standard rainfall conditions.
However, they can expand and contract significantly with temperature changes and may require closer bracket spacing to prevent sagging.
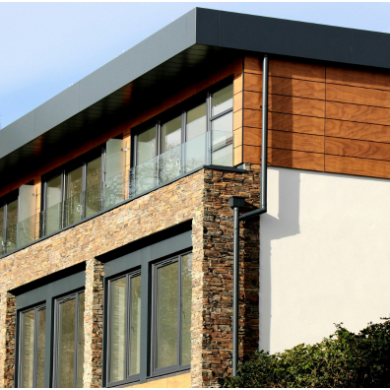
Metal Gutters (Steel, Aluminium, Cast Iron)
Metal systems such as steel, aluminium and cast iron offer:
- Greater structural strength
- Higher load capacity
- Increased longevity
- Enhanced aesthetic options for traditional or contemporary properties
Many modern steel systems use dry-fit methods with factory-fitted seals, reducing the need for silicone. Metal systems are particularly suited to larger roofs or exposed environments, but require careful handling to protect protective finishes.
Storage & Handling: Protecting Materials Before Installation
Correct storage is essential for both plastic and metal systems.
Plastic Gutters
- Store flat and fully supported
- Avoid prolonged sun exposure before installation (can cause warping)
- Keep away from heavy objects that may cause distortion
- Do not stack excessively high
Metal Gutters
Metal systems often feature protective coatings (galvanised, powder-coated, or painted finishes).
- Store in a dry, ventilated area
- Keep off the ground using timber supports
- Protect from standing water and condensation
- Avoid abrasion between lengths
- Handle carefully to prevent scratching coatings
In humid conditions, a temporary phenomenon known as blanching can occur, resulting in a white, powdery film on the surface of powder-coated aluminium due to trapped moisture. This is purely cosmetic and can be easily removed without affecting the integrity or performance of the coating.
Read our guide on the storage of aluminium and polyester powder-coated gutter systems.
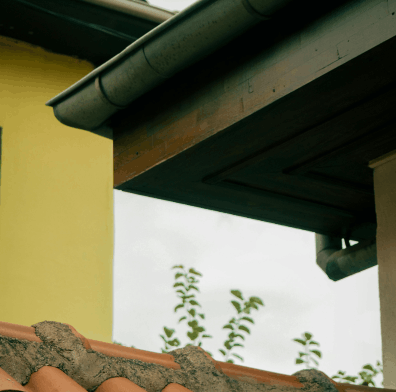
Fascia Board Integrity: The Foundation of Any Gutter System
Both plastic and metal gutters rely on a secure fascia board.
Before installation:
- Check for rot, cracks, or movement
- Ensure boards are securely fixed to rafter ends
- Replace compromised sections
- Confirm the fascia thickness is suitable for bracket fixings
Metal systems are heavier than plastic, especially when filled with water, so fascia integrity is particularly important. However, even lightweight plastic gutters will fail if fixed to weak or unstable boards.
Planning Layout & Outlet Positioning (Step-by-Step)
Correct layout ensures efficient water flow and prevents overflow.
Step 1: Measure the Roofline
Record all straight runs
Identify corners and changes in direction
Note potential downpipe positions
Step 2: Position Outlets
Install at the lowest point of the fall
Place near drainage points or building corners
For long runs (typically over 10–12m), consider additional outlets
Step 3: Calculate and Mark the Fall
Most systems require a fall of approximately:
1:600 (3mm drop per metre)
Some metal systems may allow near-level installation, depending on the design, but always follow the manufacturer's guidance.
Use a string line or laser level to mark bracket alignment.
Installing Brackets Correctly
Bracket placement is one of the most important factors in long-term performance.
Typical Spacing Guidelines
Plastic (uPVC):
500–750mm centres
Metal:
750–1,000mm centres (check manufacturer specifications)
Additional Support Required:
Within 150mm of every joint
Either side of the angles
Within 150mm of outlets
Near stop ends
Outlets and corners carry greater water load and require extra support in both systems.
Incorrect spacing is a leading cause of sagging and joint failure.
Cutting and Drilling: Best Practice for Each Material
Cutting Plastic Gutters
Recommended tools:
- Fine-tooth hacksaw
- Mitre box for accuracy
Steps:
- Measure and mark clearly
- Cut square to ensure seal integrity
- Remove burrs
- Allow correct expansion gap inside fittings
Plastic expands considerably, so never cut lengths too tight.
Cutting Metal Gutters
Recommended tools:
- Fine-tooth hacksaw
- Powered shears
- Nibbler
- Non-ferrous blade for aluminium
Avoid abrasive angle grinders, particularly on coated steel systems, as heat damages protective finishes.
After cutting:
- Remove metal filings
- Smooth sharp edges
- Apply manufacturer-approved touch-up paint to exposed steel edges
Forming Outlet Holes (If Required)
Some systems require on-site outlet cutting.
Steps:
Mark centre position
Drill a pilot hole
Use the correct size hole saw
Deburr edges
Clean thoroughly before fitting the outlet
Ensure outlet fittings sit correctly without distorting the gutter profile.
Sealants & Jointing
Not all systems require sealant.
Plastic Gutter Systems
Usually push-fit with rubber seals
Silicone may be used where recommended
Surfaces must be clean and dry
Metal Gutter Systems
Many steel systems use dry-fit EPDM seals
Some systems require neutral cure silicone or butyl sealant
Temperature Guidelines (Both Materials)
Apply sealants between +5°C and +30°C
Do not apply to wet or frozen surfaces
Ensure surfaces are clean, dry, and free from debris
Using the wrong sealant or applying it in poor conditions can compromise joint performance.
Managing Thermal Movement
Both plastic and metal expand and contract with changes in temperature.
Plastic typically expands more than metal, so:
- Do not fully butt gutter lengths together
- Follow the marked insertion depth guides in fittings
- Use expansion joints where specified
- Do not overtighten brackets
Failure to allow movement can cause:
Buckling
Joint separation
Leaks
Noise during temperature change
Thermal movement must always be considered, regardless of material.
Installing the Gutter Lengths
Start at the highest point
Insert into brackets correctly (rear edge first where applicable)
Work towards the outlet
Check alignment regularly
Ensure seals are seated properly before locking connectors.
End Caps & Stop Ends
Fit according to left- or right-hand orientation
Ensure seals are clean and correctly seated
Apply sealant only if specified by the system
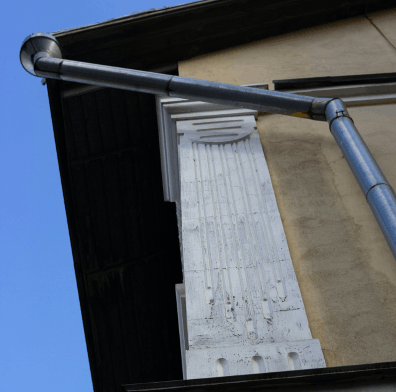
Downpipe Installation
Downpipes must handle the full roof water load.
Secure brackets at max 1.8m centres
Install brackets at each offset
Keep pipes vertically aligned
Ensure a secure connection to the underground drainage
Metal downpipes require robust fixings due to their weight, but plastic systems also require proper support to prevent movement.
Optional: Leaf Protection
Leaf guards can reduce maintenance and prevent blockages.
Options include:
Mesh guards
Outlet strainers
Downpipe protection
Particularly useful for properties near trees.
Which Gutter Material Is Right for Your Property or Project?
Choosing the right material affects durability, appearance, maintenance, and long-term value.
uPVC (Plastic)
Best for modern homes and budget-friendly replacements. Lightweight, corrosion-resistant, and easy to install, though generally shorter-lived than metal systems.
Aluminium
A strong, all-round option that offers durability without excessive weight. Well-suited to contemporary homes and properties exposed to frequent rainfall.
Steel or Galvanised
Ideal for larger roofs or higher water volumes. Strong and rigid, but requires correct coatings and maintenance to prevent corrosion.
Cast Iron
Often chosen for period or heritage properties. Heavy and more expensive, but extremely durable and visually appropriate for traditional buildings.
A full gutter replacement doesn’t need to be complicated; it just needs to be thorough. By working through this checklist, you ensure every component plays its part in protecting your home from water damage.
Taking the time to plan properly means fewer issues, less maintenance, and a gutter system that performs reliably for years to come. If you’re searching for a new gutter system or replacing an existing one, explore the full range at Gutter Centre or contact our expert team to see how we can help!